
Have you ever wondered if your desktop could deliver a truly superior streaming experience? Many users struggle with clunky interfaces that ruin their favorite shows. Fortunately, finding the right tool can change everything.
This tivimate guide explores how to bring a premium IPTV player to your computer. By following our clear steps, you will unlock a smooth, organized way to watch content.
We will walk you through the tivimate setup process to ensure your environment is ready. Running tivimate for mac is easier than you might think when you have the right instructions. Get ready to transform your viewing habits today.
Key Takeaways
- Learn how to prepare your desktop for high-quality streaming.
- Discover the benefits of a user-friendly interface.
- Follow simple steps to install your favorite player.
- Gain confidence in managing your digital media library.
- Optimize your system for a seamless entertainment experience.
Understanding the Compatibility of Tivimate for Mac
The journey to getting your media center running on a Mac begins with understanding why these two platforms do not naturally speak the same language. Many users often ask why they cannot simply download their favorite streaming app directly from the App Store. The answer lies in the fundamental differences between operating systems.
Because the software was built specifically for the Android TV ecosystem, it relies on libraries and frameworks that are exclusive to that environment. Without these specific components, the application cannot execute its code on a standard macOS interface. This is why a direct installation of tivimate for mac is not possible through traditional means.
Why Tivimate is Designed for Android TV
The developers focused on Android TV because it offers a highly optimized experience for large-screen displays and remote control navigation. By targeting this specific platform, the app ensures that users enjoy smooth playback and a responsive interface. This design choice prioritizes hardware acceleration and specific media codecs that are standard in the Android world.
When you use the app on its native platform, it interacts directly with the underlying hardware. This creates a seamless experience that is difficult to replicate on other operating systems. Understanding this native architecture helps you appreciate why the software performs so well once it is properly configured.
The Role of Android Emulators on macOS
To bridge the gap between these two different worlds, we use a tool known as an Android emulator. An emulator acts as a virtual environment that mimics the hardware and software of an Android device right on your computer. By creating this digital bridge, you can successfully run tivimate for mac within a controlled space.
Virtualization technology allows your computer to allocate resources like memory and processing power to the emulator. This ensures that the app believes it is running on a genuine Android TV box. Once the emulator is active, it provides the necessary foundation to install and launch your favorite streaming tools without any compatibility errors.
Preparing Your Mac for the Tivimate App
A smooth streaming experience on your Mac starts with verifying your hardware and choosing the right software tools. Taking the time to prepare your system ensures that the tivimate app runs without unnecessary lag or crashes. Proper setup at this stage prevents common performance bottlenecks during your daily viewing sessions.
System Requirements for Smooth Performance
To enjoy high-definition content, your Mac should meet specific hardware standards. We recommend at least 8GB of RAM and a modern processor to handle the emulation process effectively. Ensuring your macOS is updated to the latest version will also provide the stability needed for media playback.
You should also verify that you have enough disk space available for the emulator and the application files. A solid-state drive (SSD) is highly recommended to reduce loading times significantly. These simple checks create a stable foundation for your entire setup.
Choosing the Right Android Emulator
Since macOS does not run Android apps natively, you need a reliable bridge to make the software work. While many users often search for tivimate for windows solutions, the macOS versions of these tools are equally powerful and feature-rich. Selecting the right emulator is the most critical decision you will make during this process.
Comparing BlueStacks and NoxPlayer
Both BlueStacks and NoxPlayer are industry leaders, but they offer slightly different experiences for Mac users. The following table highlights the key differences to help you decide which tool fits your needs.
| Feature | BlueStacks | NoxPlayer |
|---|---|---|
| Performance | High stability | High customization |
| Interface | User-friendly | Advanced settings |
| Resource Usage | Moderate | Lightweight |
BlueStacks is often praised for its intuitive interface, making it a great choice for beginners. Conversely, NoxPlayer provides deeper control over system resources, which can be beneficial for older Mac models. Choose the one that aligns best with your hardware capabilities to ensure the best results.
Downloading and Installing the Tivimate APK
Installing the tivimate app on your macOS device is a straightforward process when you follow the right steps. By using a trusted emulator, you can bridge the gap between mobile software and your desktop environment. Ensuring you have the correct files is the first step toward a stable and high-quality streaming experience.
Locating the Official Tivimate APK File
To maintain the integrity of your system, always perform your tivimate download from verified and official sources. Avoid third-party websites that might bundle unwanted software with the installation package. Using the official tivimate apk ensures that you receive the most recent updates and security patches directly from the developers.
Step-by-Step Installation Process via Emulator
Once you have secured the file, the installation process is remarkably simple. Most modern Android emulators allow you to install applications by interacting directly with the file system.
- Locate the downloaded file in your Mac’s “Downloads” folder.
- Open your chosen Android emulator and keep the window visible.
- Drag the file directly into the emulator interface to trigger the installer.
- Follow the on-screen prompts to complete the setup of the tivimate app.
Managing Permissions and Security Settings
After the initial installation, you may need to adjust specific settings within your emulator to ensure everything runs smoothly. Android systems often require explicit permission to allow apps to access your network or storage. Navigate to the settings menu inside your emulator to verify that all necessary permissions are granted.
It is also important to ensure that your emulator is configured to allow installations from unknown sources if prompted. By keeping these security settings updated, you protect your Mac while enjoying the full functionality of your chosen software. Proper configuration is the key to a seamless and secure streaming environment.
Configuring Tivimate for Mac for Optimal IPTV Streaming
Proper configuration is the secret to unlocking the full potential of your streaming setup on macOS. Once you have successfully installed the application, taking a few moments to adjust the settings will ensure a smooth and professional viewing experience. Whether you are a new user or a seasoned enthusiast, a clean tivimate setup makes all the difference in how you interact with your content.
Initial App Launch and Interface Navigation
When you first launch the application, you will notice a clean, intuitive interface designed for ease of use. Since you are running this on a computer, you can rely on your mouse and keyboard to navigate through the menus with precision. Efficiency is key when managing large libraries of content, so take a moment to familiarize yourself with the sidebar and the main dashboard.
“The best way to predict the future of television is to build it yourself.” — Anonymous
You can easily browse through your categories and settings by clicking on the gear icon located in the main menu. If you are looking for a more native experience, you might also consider exploring the Tivimate IPTV player for direct integration. Mastering these basic navigation controls will help you manage your tivimate for mac environment like a pro.
Adding Your IPTV Playlist via M3U URL
To start watching your favorite channels, you must first link your service provider’s data. Navigate to the “Add Playlist” option within the settings menu to begin the process. You will be prompted to enter your M3U URL, which is the standard format for most tivimate IPTV services.
Ensure that you enter the URL exactly as provided by your service provider to avoid connection errors. Once the link is verified, the application will automatically import your channel list and organize it into logical categories. This step is essential for maintaining a clean and accessible library of live streams.
Setting Up Electronic Program Guide (EPG) Sources
A functional program guide is what truly elevates your tivimate setup from a simple player to a comprehensive media center. After your playlist is loaded, head over to the EPG section to map your guide sources. You will need to input the EPG URL provided by your service to ensure that your channel guide is fully populated with current show information.
Once the EPG data is synced, you will see a detailed schedule for every channel in your list. This allows you to plan your viewing and stay updated on what is currently airing. By keeping your tivimate for mac configuration optimized, you ensure that your tivimate IPTV experience remains both high-quality and highly organized.
Exploring Advanced Tivimate Features
Mastering the advanced capabilities of this player transforms how you interact with your digital content. While the basic setup provides a solid foundation, the true potential of the software is unlocked when you dive into the deep customization options. By utilizing the Tivimatu IPTV player, you gain access to a suite of tivimate features that allow for a highly personalized viewing environment on your Mac.
Customizing the User Interface and Themes
You can easily tailor the visual experience to match your personal preferences. The application allows you to modify themes, adjust font sizes, and change the overall layout of the interface. Personalizing your dashboard ensures that your most-watched content is always front and center, making navigation much faster on a larger Mac screen.
Utilizing Multi-View and Picture-in-Picture Modes
One of the most impressive tivimate features is the ability to watch multiple streams simultaneously. Multi-view mode is perfect for sports fans who want to keep an eye on several games at once without switching channels. You can also use picture-in-picture mode to keep a stream running in the corner while you browse through your library or manage other settings.
Managing Favorites and Channel Categories
Keeping your content organized is vital for a seamless experience. You can create custom channel categories and mark your preferred shows as favorites for quick access. These tivimate features help you declutter your interface, ensuring that you spend less time searching and more time enjoying your favorite media.
| Feature Name | Primary Benefit | Ease of Use |
|---|---|---|
| Multi-View | Simultaneous Streaming | High |
| Custom Themes | Visual Personalization | Medium |
| Category Sorting | Library Organization | High |
| Favorites Sync | Quick Access | High |
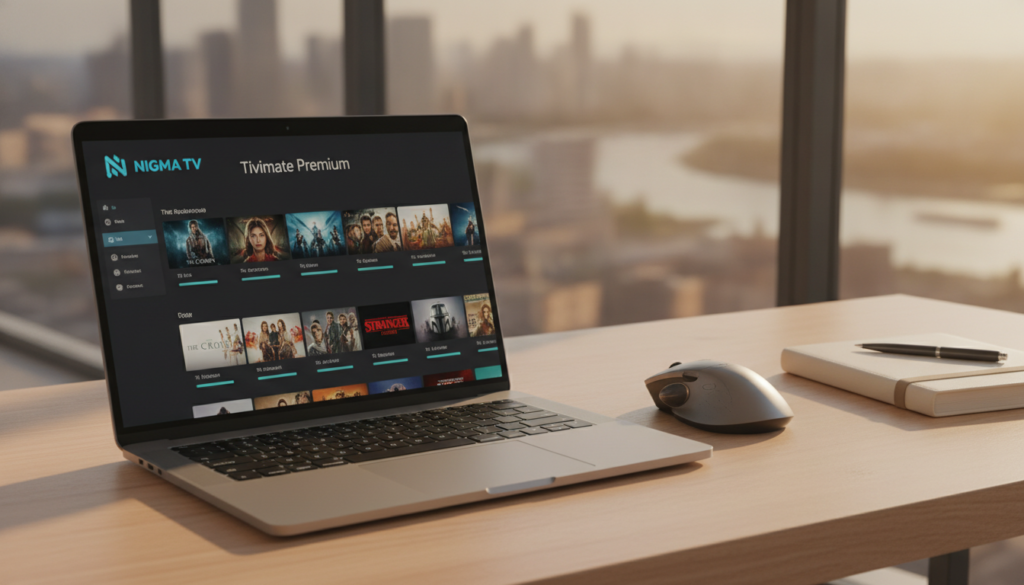
Unlocking the Benefits of Tivimate Premium
Unlocking the full power of your media player is a straightforward process that offers significant long-term benefits. While the base version provides a solid foundation for viewing, tivimate premium introduces advanced tools that transform how you interact with your content library.
Comparing Free vs. Premium Functionality
Deciding whether to upgrade often comes down to understanding the specific limitations of the free version versus the expanded capabilities of the paid tier. The following table highlights the core differences you can expect when you choose to invest in the software.
| Feature | Free Version | Premium Version |
|---|---|---|
| Multi-View | Limited | Full Support |
| Recording | Not Available | Advanced Scheduling |
| Catch-up | Basic | Extended Access |
| Device Limit | 1 Device | Up to 5 Devices |
How to Purchase and Activate Your Subscription
Acquiring a tivimate premium license is designed to be a seamless experience directly within the application interface. You do not need to navigate away from your media setup to complete the transaction.
- Open the application and navigate to the “Settings” menu.
- Select the “Unlock Premium” option to view current pricing and plans.
- Follow the on-screen prompts to complete your purchase through the secure payment gateway.
- Once the payment is confirmed, your account will automatically activate the tivimate premium features.
Syncing Premium Features Across Multiple Devices
One of the greatest advantages of this subscription is the ability to maintain a consistent experience across your entire household. You can easily sync your tivimate premium status by logging into your account on additional devices.
Simply use the same credentials on every installation to ensure your favorites, custom categories, and recording schedules remain synchronized. This flexibility allows you to enjoy high-quality streaming on your Mac and other compatible hardware without needing separate subscriptions for each screen.
Troubleshooting Common Issues on macOS
Running emulated applications on macOS sometimes leads to unexpected performance hiccups that require a bit of troubleshooting. While the experience is generally smooth, minor technical glitches can occasionally disrupt your viewing. Fortunately, most of these problems are easy to resolve with a few simple adjustments to your system settings.
Resolving Playback Buffering and Lag
If you notice your streams are buffering or lagging, the issue often stems from network instability or insufficient resource allocation. Consistency is key when streaming high-definition content. You should first verify that your internet connection is stable and that no other background applications are consuming excessive bandwidth.
- Check your Wi-Fi signal strength or switch to a wired Ethernet connection.
- Clear the application cache within the settings menu to remove temporary files.
- Ensure your Mac is not running heavy background tasks that might interfere with the emulator.
Fixing EPG Loading Errors
An empty or outdated Electronic Program Guide (EPG) can be frustrating when you are trying to find your favorite shows. This error usually occurs when the source URL is unreachable or the refresh interval is set too high. Updating your EPG sources manually is often the fastest way to restore missing data.
If the problem persists, verify that your M3U playlist provider is currently active. Sometimes, the server hosting the guide data may be temporarily down. You can also try changing the update interval in the app settings to a more frequent schedule to ensure your data stays current.
Addressing Emulator-Specific Performance Glitches
Because you are running an Android environment on a Mac, the emulator acts as a bridge that requires specific system resources. If the app feels sluggish or unresponsive, you may need to adjust the emulator’s internal settings. Allocating more RAM and CPU cores to the emulator can significantly improve overall performance.
“Optimizing your virtual environment is the most effective way to ensure a seamless experience when running mobile applications on desktop hardware.”
Navigate to the settings panel of your chosen emulator to modify these parameters. Try increasing the allocated memory to at least 4GB if your Mac hardware allows it. By providing the emulator with more breathing room, you will likely eliminate most performance-related glitches and enjoy a much smoother streaming experience.
Best Practices for a Seamless IPTV Experience
Maintaining your setup is the secret to enjoying uninterrupted entertainment on your Mac. By taking a proactive approach to your digital environment, you ensure that your tivimate app runs smoothly every time you sit down to watch your favorite content.
Optimizing Network Settings for High-Definition Streaming
High-definition streaming demands a stable and fast internet connection. To minimize buffering, consider connecting your Mac directly to your router via an Ethernet cable rather than relying on Wi-Fi.
If you must use wireless, try to position your device closer to the router to reduce signal interference. You can also access your router settings to prioritize streaming traffic, ensuring your connection remains dedicated to your media playback.
Maintaining App Updates and Cache Management
Regular maintenance is essential for the longevity of your tivimate IPTV service. Over time, temporary files can accumulate and slow down the interface, leading to potential performance glitches.
Make it a habit to clear the app cache periodically through your emulator settings. Additionally, always check for the latest software updates to ensure your setup remains compatible with the newest macOS versions and security patches.
Ensuring Privacy and Security While Using IPTV
Protecting your digital footprint is a critical step for any user. Using a reputable VPN service is a highly recommended practice to encrypt your traffic and keep your viewing habits private.
Always source your playlists from trusted providers to avoid malicious links. By staying vigilant and keeping your tivimate app updated, you can enjoy your tivimate IPTV experience with complete peace of mind.
Conclusion
Setting up your favorite streaming software on a Mac transforms how you watch live television. This tivimate guide provides the essential roadmap to achieve a professional-grade media center right on your desktop.
You now possess the tools to manage complex playlists and organize your preferred channels with ease. Take time to experiment with the interface settings to create a viewing environment that suits your personal style.
Your journey into high-definition streaming does not stop with the initial setup. Regular updates and smart cache management keep your application running at peak performance levels.
Refer back to this tivimate guide whenever you want to explore new features or adjust your network configurations. Your feedback helps improve the community knowledge base for all users.
Share your favorite customization tips with other enthusiasts in online forums. Enjoy the freedom of a fully optimized IPTV setup tailored to your specific entertainment needs.